
Paper wicker bird cage. DIY master class on a cage made from newspaper tubes with video
When I started weaving, I had no idea how in demand this type of creativity was. Almost everything was planned for the house, for gifts (again, for the house, but not your own). And then I saw handbags, and then display cases displaying charming wickerwork.
Spring is coming, imagine several of these cages hanging on the tree where you are taking photos - beautiful!

Master class from a needlewoman from Minsk, whose work I am inspired by following her pages on Instagram and VKontakte.

“For a large cage like this one (height 60 cm), I built up the posts after lifting them from the bottom - I cut off the old ones, inserted new ones next to each other on the pva, and then covered the stumps next row. But usually I prefer to build up the racks at the bottom, it’s more reliable.
I begin to weave hanging rows

When weaving “hanging” rows, I glue the working tubes to the racks every 3-4 racks so that the rows remain at the same level and do not move down.

I decide in advance how many posts will form the entrance to the cage, and I don’t weave these posts, but turn around and weave in the opposite direction.


I cut the tubes and glue them. When making the entrance, these places will be covered with an arch made of flagellum.

At this stage, I increased the racks - these were not long enough to form a dome. For larger cages like this one, I insert wire inside the posts.

I form a dome and tie it with jute twine

I left 6 ends of the entire tail, cut off the rest and coated them generously with PVA.

I divided the 6 ends into 2 parts (3 on each side), and connected the bundles to each other in the form of a ring

Now I wrap the ring with tubes according to the principle of weaving a twisted handle. You can make it simpler and just wrap the ring with one tube. It will look different.

I wrap the ends and twine with a tube, coating them with glue in some places.

I twist a flagellum from two tubes to form the entrance to the cell

I cut off the free posts at the bottom, use a thick knitting needle to make a hole in the weaving, insert the beginning of the flagellum there and glue it along the post

I form an arch from the flagellum, marking at the top the level at which I will cut off the free posts

I cut off the posts, and push the ends inside the flagellum and fix them with glue. After the glue has dried, I do the same on the other side. If you simply glue the flagellum to the top of the posts, the arch will stick out slightly forward.

For a large cage, like this one (height 60 cm), I built up the posts after lifting them from the bottom - I cut off the old ones, inserted new ones next to each other on the pva, and then covered the stumps in the next row. But usually I prefer to build up the racks at the bottom, it’s more reliable.”


A vintage birdcage or flower cage can decorate the interior of any room. Having studied the master class on a cell from newspaper tubes, even a person who is not familiar with the technique of weaving from newspaper tubes can create such a beautiful decorative item.

This is one of many options for creating, seemingly from unnecessary materials, objects that are distinguished not only by their beauty, but also by their functionality. At first glance, it is not always possible to tell exactly what such a cage is made of.
Possibility of use
Objects and products made from tubes can be called a striking example of how useful things can be created from simple paper and newspapers. The weaving technology described in the presented master class can be used to create a variety of objects. It could be simple box for storage, basket, fruit vase, photo frames, watch frames. Some craftswomen even learned to make a variety of decorative crafts, paintings, toys and even original hats.
What we need:
- Newspapers. They can be found in every home. To use it in weaving, the newspaper sheet must be intact, even, and free of bends. It is best if there are large format newspapers;
- Magazines. From pages with bright colored drawings it is possible to get some pretty interesting tubes. But due to their high density and smoothness, they are difficult to use in work. It will be difficult to weave from them and a layer of paint will not adhere well to them;
- Office paper. It is also quite dense, but it can be easily painted in the desired color;
- Cardboard or any thick paper. In some products it will be required to create a base;
- Glue. You can choose any one designed for working with paper. The main thing is to choose something that is not too liquid. It will be necessary for fastening the tube, gluing elements, and subsequent decoration;
- Spoke. You can replace it with a long thin pencil or a wooden skewer. Will help to twist a thin and even tube;
- Scissors;
- Stationery knife;
- Form. It is selected depending on the size and shape of the product being created. It is better if its surface is smooth;
- Decor elements. You can use beads, rhinestones, lace, decorative stones, ribbons, flowers and more;
- Stationery clips or clothespins. Will be required for intermediate fixation of elements;
- Dye. It is better to choose acrylic, gouache or wood stain. They retain color and brightness well on paper;
- Varnish for woodworking. Necessary for securing the weave in the finished product and giving it a beautiful look.
Related article: Anemones in a jug. Cross stitch patterns
To do this, you need to cut the newspaper into strips approximately 7 centimeters wide. Using a knitting needle, twist the tube tightly, coating it with glue. After waiting a little for the glue to set, you can pull the knitting needle out of it.
If flat tubes are needed to weave a product, then round tubes can be easily turned into flat ones using an iron or a round object.


Basic work process
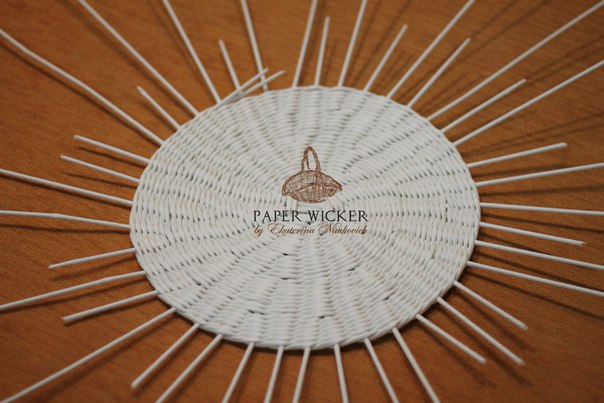
To weave a cage with your own hands, you first need to choose a shape the right size. To make the task easier, the bottom of the future cage can be cut out of thick paper or cardboard. Based on the size of the mold, for flying around you need to prepare two identical parts. In our case these will be circles. Eight tubes are glued to one of the circles. Of the seven, the base of the side surface will be created and one is needed for the braid. A second circle is placed on top, well coated with glue. At this moment it is better not to rush, wait a little until the glue dries. The bottom of the cage is ready!
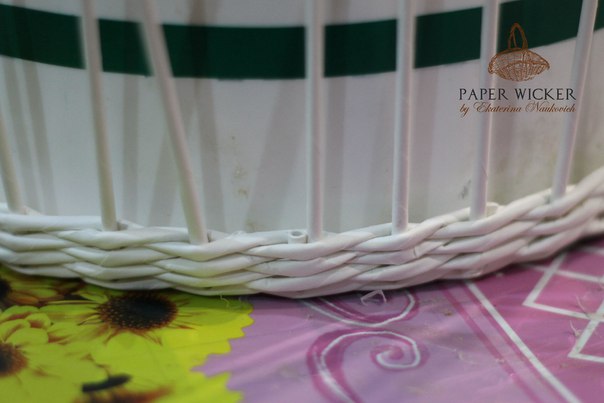
Next, the selected shape is installed on the bottom. All seven tubes must be lifted up and secured along the edge of the mold using clamps or clothespins. Now you can start creating the side surface. Each of the vertical posts must be braided horizontally to the required height. It is better to braid the shape as tightly as possible, for greater strength of the product.
During the weaving process, there will be a need to grow the paper vine. We cut off the extra piece and glue it with inside. Having retreated the required distance, we begin to make the transverse bars of the cage. Their number and height of location depend only on the intended result. Now you can complete the top. It's simple, you just need to gather all the rods together and fasten them. If the vertical rods are not long enough, they can be extended to the required height. The cage made from newspaper tubes is ready!
Surely, many people are delighted with the vintage style. There is an aura of mystery and superiority about it, and some feel a continuous connection with previous generations. And how many mysteries, metaphors and even mystical meanings are endowed with cells? Now let's imagine it together? Do it yourself and you’ll get a magical combination! And our master class on creating a cage from the simplest newspaper tubes will come in handy for you. And the photo will serve as an excellent visual example. Here are some examples of how you can design a cage, but human imagination has no limits, so you can play with styles, sizes and designs as much as your heart desires. But, in order to start creating, we need to know what materials we will need. It’s easy to notice that the materials are common and if you don’t have them on hand, buying them won’t be a problem. So, in addition to the fact that the cage will be beautiful, it will also be budget-friendly, which is doubly pleasant. It's not that difficult, especially when there are photos and video instructions. The main thing is to adhere to all the nuances and then everything will work out. Then, on the contrary, we move the end of the working tube that is behind the second rack forward to the next 3rd rack, and move the front end behind the rack. We need a diameter of 20 cm. To do this, you need to take such decorative things that have sunk into your soul. It can be all kinds of bows, flowers, beads, paint, aged notes. Of course, you can paint the cage like this yourself, but, alas, not everyone has artistic talent. Option one, which you can use to decorate the cage:
Option two:
In fact, there are a lot of options, it all depends on your imagination, capabilities and time you have. This can be from a large-scale and complex design to the simplest. If you like it, then this could even be a good option for earning extra money. Such a cell will always make you happy, even on the gloomiest day, because everything that is made with your own hands is valued much higher than what is made in a factory. Visual information is better remembered and perceived, so here are a few video links that will be useful for making a cage from the simplest newspaper tubes:
Making a cage from newspaper tubes: master class with description
We will need:


Video on the topic of the article