
Protective filters for canon lenses. Lens filters: how to choose and why to use
Not long ago, I had a desire to slightly improve my Nikon D3000 and order a corresponding lens hood with a diameter of 52 mm for it. Main task This lens cover is designed to effectively cut off light; in addition, this thing indirectly serves to protect the lens from impacts and scratches. It so happened that I made the purchase remotely via the Internet, and buying a hood separately was not as profitable as ordering a whole set: three filters per lens, four attachment lenses, a hood and a protective cap.
Two weeks later my package arrived, but the fact is that before this purchase I had not used light filters, and my knowledge of what they were needed for was purely theoretical. Today I invite you to look with me at what actually happens when shooting with various filters, and together figure out why they are needed.
Popular lens filters
Polarizing filter
The first filter I would like to talk about is polarizing. You can see it in the photo below.
Polarizing filters are the most commonly used filters in digital photography. These filters are abbreviated PL (CPL, LPL) and their main task is to reduce the amount of reflected light hitting the camera sensor. Polarizing filters reduce the brightness of photos and increase their saturation.

There are two types of polarizing filters: circular (CPL) and linear (LPL). Linear polarizing filters are less effective at reducing polarizing light than circular ones, but they can be placed at any angle, while circular polarizing filters must be placed at right angles to the optical axis.

A circular filter is a system of two mandrels: a mandrel with glass + a mandrel. The glass mandrel rotates freely, and by turning it at a certain angle, we are able to achieve the desired effect.

However, the polarizer should be used with care and skill. Do not use it as a protective filter for the lens or wear it without taking it off. A polarizing filter can have a negative impact on your photo because it steals light, increasing the risk of blurry photos when shooting without a tripod.
FLD filter (fluorescent light filter)
The second filter that came with the kit was an FLD filter. It is characterized by a bright purple hue.

What is it for? It reduces or completely eliminates the unpleasant greenish tint that appears in photos containing fluorescent lamps.

You can use it when shooting city landscapes at night. FLD filters were originally created for film cameras and are not needed for digital photography, especially in RAW format. So I'm unlikely to use this filter.
UV filter
The third and last filter included in the kit is a UV filter.
The UV filter is most often used today as a protective filter. The UV filter does not have any effect on the image (ideally) and can be used during any type of shooting. On film cameras, a UV filter increases contrast and reduces haze, but in the era of digital photography, almost no one shoots with such cameras.
It is very important that the UV filter is good quality and kept clean, as it can significantly degrade image quality and add much-needed glare.
Should I use a UV filter? If you are the owner of an expensive lens, it is advisable to have one protective filter, because it’s easier to replace it than to repair the lens. If your camera is an amateur one, then it’s worth thinking about the advisability of using it.
To summarize: of the three filters included in the kit, the most necessary is the polarizing filter, the most frequently used is the protective UV filter, and the useless is the FLD filter.
When the camera was invented, people didn’t care much about the quality of the image - after all, it was just nice to see your face, albeit terribly blurry, on some surface, because in this way your face was preserved at the age when it was taken, but a person rarely has anything -enough is enough, and perfectionism simply doesn’t give you peace; you want to quickly move from good to better. Gradually, lenses appeared on cameras, resolution increased and, eventually, color appeared, and then it became clear that colors do not really correspond to what the eye sees. There was a need to correct these same colors, which was further complicated by the fact that each film also had its own shade.
No, don’t think about it, in the days of black-and-white photography, filters were also necessary: experience has shown that warm filters are quite helpful in portrait photography, red makes the face more legible and the sky more contrasty - anyway, the result was a monochrome picture, so what’s the difference? , what color glass to put, because with the absence of color, the final frame did not receive unnecessary tones.
At the end of film photography, digital began to rule everything, and with the advent of convenient editing programs and powerful processors, editing cards becomes easier and faster every year. This situation has led to the fact that color filters have practically ceased to be used; they have long been replaced by digital filters, which have become almost a standard tool in editing programs. Of the filters sold and produced today, only those that have a neutral color remain. However, there are also color filters for portable light, but their need has never disappeared.
What types of filters are there?
First of all, there are filters for lenses (screwed into the thread of the filter mount or inserted into a special holder on the lens) and filters for pulsed light, installed in the mount for the filter in the flash or simply secured with an elastic band for money. We'll talk about everyone.
Lens filters:
- protective, the simplest type of filter, they simply protect the front lens from scratches, are installed upon purchase and cannot be removed, as they have similar mounting threads for other filters with reverse side. The structure is ordinary glass, just of slightly better quality compared to window glass. Labeling usually uses " protector».

- ultraviolet, which are often used as protective ones, additionally also reduce the flow ultraviolet radiation, which the human eye does not see, but the matrix sees perfectly. In the final image, UV and some of the polarized light causes a cyanide tint to appear in the sky and can even overexpose it. Using a UV filter can often reduce this effect, making the sky a little darker and a little bluer. Usually designated as " UV».
- infrared On the contrary, filters are very specific. In contrast to ultraviolet, which block only the ultraviolet part of the spectrum, on the contrary, they filter out the entire visible spectrum, leaving the infrared. Modern digital cameras capture some of it, so they can record information under very specific conditions. Since the filter covers the entire visible spectrum, you won’t even be able to focus or measure exposure - the viewfinder will be completely dark. Therefore, you must definitely use a tripod (you will definitely use long exposure), manual and focus on the subject in advance. The result of applying the filter is very unusual: the trees turn out to be winter-white, the sky is black, and some objects change their color in a glitchy way. Filters are designated as " IR».

- polarizing, which are of two types, linear and circular - the first do not very effectively reduce polarized light, invisible to our eye, but across the entire field of the filter and at any angle, the second are much more effective in reducing this flux only at right angles to the optical axis, any of them is necessary rotate before each frame, controlling the effect in the viewfinder. The latter are much more popular than the former (naturally, because they put more pressure on unnecessary spectrum), which makes the former much more difficult to buy. In fact, the effect of applying the filter looks like a more contrasting picture: the sky is very blue, the shadows are deeper, and the water is almost transparent, with a minimal amount of glare; at this angle, even our eyes cannot see the bottom, and in the frame the layer of water will be absolutely transparent, depending from its purity, of course. Due to the fact that the filter actually consists of two rings, it turns out to be very thick and wide angle lenses cuts off the corners of the image by vignetting, which is why many manufacturers have switched to thin polarizing filters (marked “ slim» and more high price). Filters are marked as " P.L."(linear) and " C-PL"(circular).
- gradient, which also come in two types, rotating 50/50, which have a half-frame darkening and rotate like polarizers, and regular ones, square in shape for installation in a special mount on the lens. They are needed to equalize the exposure when shooting landscapes, to darken it a little top part images, and the bottom, accordingly, is better exposed. As a result, you get an image with a correctly exposed sky (blue with beautiful clouds) and land or water (no shadow gaps, with sufficient detail). Both types of filters are inconvenient: round ones divide the frame, contrary to the canons of framing, exactly in half, and square ones require a special adapter, so they are far from compact and efficient. As an analogue of using a filter, panoramic or stitching is now often used.

- neutral, which are of the same type, but differ in density. They are all there to lengthen the exposure without introducing any color effects. These are simple “dark glasses” for the lens that darken the image by 1/2 stop or more. Their effect is usually indicated in the marking, for example, ND2 (two stops, i.e. a shutter speed four times longer is available, all other things being equal) or 400x (nine stops, rounded up - these can make the sun set manually). Remember that shadows darken more than highlights, and in most cases, if you use too dark, the shadows will fail. The effect of their use is visible when you need to shoot, for example, a portrait in bright sun, but with an open aperture, and with a full-function flash, or blurry water when shooting a sunset or dawn, when the sun dominates the exposure; many also shoot waterfalls in sunny places - in general, all cases when you need to forcibly lengthen the shutter speed or open the aperture if the lighting conditions do not allow you to do this. They are designated, as can be understood from the above, “ ND", followed by a specific number.
- colored, which were relevant in the film era for working with black-and-white and color films.
Light filters for flashes- with these everything is much simpler, because they come in only one type, colored. It would seem, why are they needed in our time - after all, it’s so easy to correct the color with the white balance slider in the converter?! Nothing like that - after all, with the slider you edit the entire image at once, and repainting it locally can be quite expensive in terms of time, so isn’t it better to do everything right away and right?
Flash filters come in different types: plastic, glass, and even gelatin (popularly called gel filters, which is completely wrong - anyone who has seen them will confirm that they have too little to do with gel). Their essence is the same - to adjust the color of the flash, also called color temperature.
To understand the need for this, turn on your brain and turn to the color temperature scale (open or at least the monitor settings panel - there is a generally accepted Kelvin scale), you can also twist the white balance presets to see how things change (experiment and shoot one object with just lighting in JPEG, changing the white balance, you will understand everything). Converters have made white balance and color temperature generally a relative thing: you can assign any parameter to a frame shot in , within the Kelvin scale. It doesn’t matter what this leads to, but the point is that, for example, an incandescent light bulb, which is assigned the corresponding white balance parameter, will be white in the frame, and the flash pulse in the same frame will already be bluish, if the same is shown with When set to “day”, the light will turn yellow and the flash will turn white. But the real fun begins next: when set to "fluorescent lamp", there will be a distinct orange tint to the bulb and a red tint to the flash.
Such fluctuations from blue to red and back, in principle, are not scary when you do not suffer from perfectionism, and when there is only one light source in the frame - you just poke a gray eyedropper into a neutral place in the frame, and everything becomes beautiful... but once you get carried away by the strobe subtleties, how everything around is changing. The color of the flash is compatible only with daylight - everything else will cause persistent rejection. That is why all good flashes are sold with some minimum set of color filters - they are needed not for special lighting effects, but to equalize the color temperature to the available sources, so that the light bulbs in the frame do not seem glitchy - after all, the brightness of the flash will outshine any of them, and only objects illuminated by it will have correct colors.
It turns out that it’s not enough to just bring a flash into the frame - its light must also be given an appropriate shade if you don’t want a terrible mess. Quite seriously, all your objects on one side can be white, on the other yellow, and by trying to cool the “hot” side, you will make the other even colder, so the correction must be local, either with light filters or masks in the converter - the latter usually requires much more time.
Color filters have two parameters: color and density. The color is selected to match the shade of the lighting that interferes with us in the frame:
- red - under “warm” fluorescent lamps and sunset color
- orange - under “warm” fluorescent lamps or incandescent lamps, can partially replace the missing yellow or red
- yellow - for incandescent lamps
- green - under “cold” fluorescent lamps
- blue - partly replaces green, you can add yellow to it for effect
Do not forget also about - then from some you can get others.
It is also worth remembering about color contrast, which is sometimes necessary in the frame, in addition to brightness contrast, for example, a dark blue sky can be contrasted with a warm face in yellowish or orange tones. Naturally, this does not mean that against the background of a crimson sunset, the face must necessarily be green.
However, let's return... the second parameter of the light filter is density, expressed in the number of brightness steps that it steals; accordingly, it will be necessary to increase the brightness of the flash. The marking is written on the filter itself, like 1.2 EV, etc. A denser filter, naturally, adds more color into the frame, i.e., it should be applied depending on how brightly the frame is illuminated with an “alien” color. It’s like with paint - if you put an additional layer, the surface will be darker and more saturated.
Nothing in our life lasts forever, we must try to preserve those things that are dear and necessary to us. To keep your lens safe and sound, you definitely need a protective filter.

Dust, dirt, water - all this very quickly destroys the lens. Protecting the lens at any cost is the most important task of a protective filter! Sometimes even at the cost of his life:

This is how an unsuccessful airsoft ball hits the lens. If it weren’t for the filter, my Tokina and I would cry along with her :)
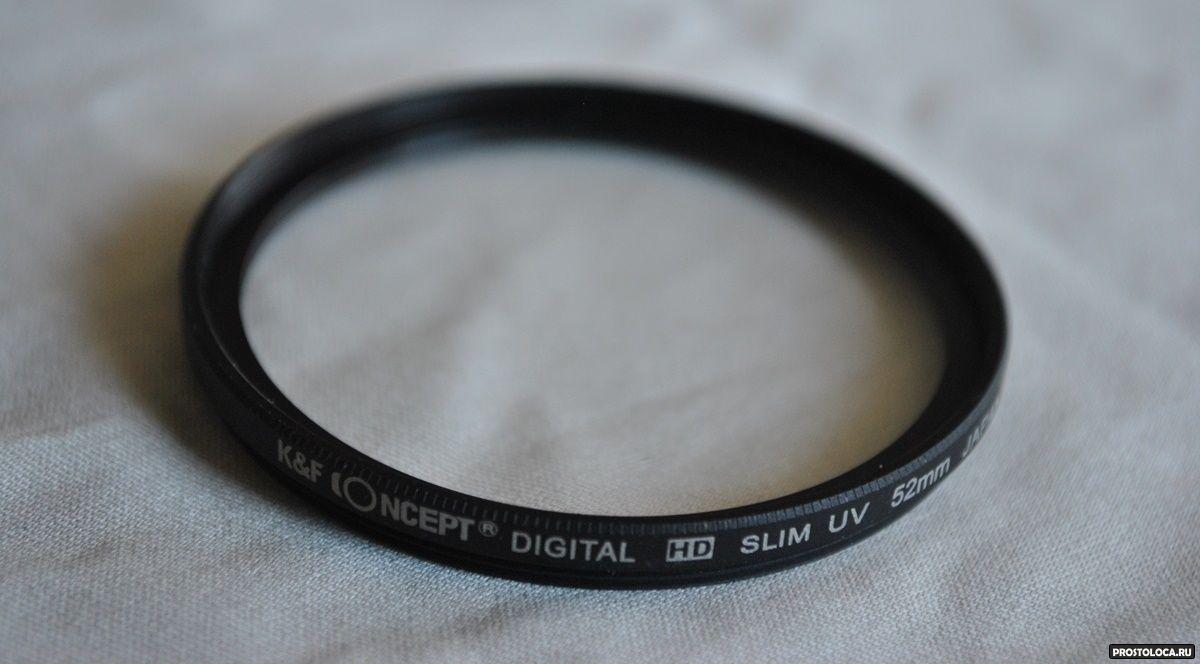
To find out which filter is needed for your lens, it is enough to know just one parameter - diameter, it must be written on the lens and on inside lens caps. There is one logical pattern here: the larger the filter diameter, the more expensive the filter. And if you spend $10-15 on a 52mm filter, then on a 77mm filter you will spend at least $30-40.
Buying a filter will not be difficult; any photo store will provide you with wide range, but that’s the problem! It is so wide that the buyer is often lost and does not know what to buy. The seller, in turn, cannot really explain how one filter differs from another, and when you ask the question: which manufacturer’s filter to buy, they are completely stunned, because they themselves don’t know it, the main thing for them is to sell it and preferably at a higher price.
So that you don’t get lost, I’ll explain to you what’s what. There are three main types of protective filters: ultraviolet (UV designation on the filter), skylight (SKY), and neutral (N), some manufacturers indicate it as Normal.
The most common ultraviolet protective filters (UV), they supposedly protect the matrix from ultraviolet waves, but in reality you won’t be able to check this, so we’ll leave big words about their colossal protection for sellers.
Skylight filters (SKY) have a light pink tint, due to this your photos will go into warm colors, I don’t see the point in this, because...
This is not always necessary and not everyone likes it. They have two markings 1A and 1B, the second is even “warmer”.Neutral protective filters (N) are filters without any bells and whistles, ordinary transparent clarified glass.
I recommend buying either ultraviolet or neutral density filters. Their prices are approximately the same. They do not spoil your photos with different shades and do their main task - protect the lens from drops of water, dirt and various mechanical damage.
If you have a wide-angle lens like or, it makes sense to buy a protective filter with a thin frame, otherwise you will get a slight vignetting at a wide angle. Here is the actual difference in thickness between them:

You can also come across the designation water proof coat (WPC - water protective coating), again, I had both such filters and ordinary ones, but I didn’t feel any difference between them when I photographed in bad weather. For myself, I decided that I would not overpay for something that does not bring benefits.
As for brands, it doesn’t really matter what brand you buy, the filter is a consumable item, like a battery, and I don’t see the point in spending a lot of money and paying for the name.
Thanks for reading, stay safe!
In our article today we will tell you about inconspicuous, sometimes not even immediately visible to an outsider, at first glance small, but very good helpers every photographer - about filters. Light filters- These are special glasses in a special frame that are attached to the camera lens. What kind of light filters there are and why they are needed at all - that’s what our story will be about today.
Of course, many, even non-photographers, know that Photoshop and numerous other graphic editors today allow you to truly create real miracles. When working with it on a computer, you can make any photo darker or lighter, add more of one color or tone down another color, experiment with contrast and do much, much more. But earlier, when photographers shot on film, in order to somehow influence the photographic image, they used completely different methods. There were films and photographic papers different types, they were processed differently chemical composition developers, used other cunning processing methods. They also took photographs with light filters. There were simply a huge number of light filters in those days. Now computer programs have almost completely replaced them. Almost, but not completely! Some types of filters are very easy to find for sale in specialized stores. And they are in demand.
What types of filters are used for photography nowadays? Here are their three main groups:
- UV, or, in other words, an ultraviolet light filter. It is also sometimes called simply protective.
- Polarizing filter.
- Neutral gray filter.
Now let's talk about each group of filters in a little more detail.
Protective filters, or UV filters

If you approach the classification of light filters strictly, then you can find some confusion in this group. Experts distinguish 4 types of different light filters:
- Neutral colorless filter, or Neutral.
- Ultraviolet light filter, or UV.
- SkyLight filter.
- Haze anti-haze filter.
All of these four types of filters have one main goal: to protect the matrix and lens of your camera from ultraviolet light (the fact is that both the digital camera matrix and photographic film are quite sensitive to it, much more sensitive than human eye), protection from air haze, which is very noticeable when shooting from long distances, as well as simply mechanical protection of the front lens of the lens from various types of damage: stains, scratches, splashes, etc.
Most often in its practical work professional photographers use UV and SkyLight filters.
SkyLight type filters are slightly more expensive than other types of filters in this group. Sellers usually praise them, saying that these are the best modern light filters. But, nevertheless, this is a little different. Sellers either make mistakes or deliberately mislead buyers in order to sell a more expensive product. The point here is that the SkyLight filter was developed a long time ago and served mainly to add a little more warm tint to a frame taken on film. This, in fact, is precisely why the color of its glass has a slightly pinkish tint. In digital photography, the effect of using such a filter is practically invisible. Especially considering that all modern cameras without exception allow you to adjust the white balance. Thus, from all of the above it is easy to draw a simple conclusion: does it even make sense to pay quite a decent amount for a SkyLight filter? It seems to us that this is absolutely not worth doing.
You can write whatever you want on the product packaging or in its accompanying documents. And sellers can provide the buyer with a variety of information about the product. However, the most main function, the main “duty” of all these filters is simply mechanical protection of the lens from external influences.
UV filters allow the photographer to:
- Protect the lens from dust and sand during windy weather.
- Protect the front lens element from mechanical influences: scratches, impacts, fingerprints, etc.
- Protect the so-called “edge” on the edge of the front part of the lens (this is where the filter is usually screwed) from bends and other types of deformation in the event of an accidental impact or other similar impact.
- Protect the front lens element from atmospheric precipitation: rain, snow, splashes of salt water on the sea coast, as well as other influences during unfavorable conditions work.
- Protective filters are usually not very expensive, and they can easily be matched to each of the lenses you have.
However, never forget that any filter placed on the lens becomes an obstacle to the light flow going to the camera’s matrix. It is precisely for this reason that we do not recommend that you save too much and buy cheap filters from this group. Light filters from reputable brands from well-known manufacturers are usually made of high-quality glass and have a high degree of light transmittance.
And one more small note. We do not recommend wrapping a kind of “pyramid” of several filters onto the lens. If you decide to use a polarizing or any other light filter, then there is no need to put a protective one on top of it. This will reduce the amount of light entering the sensor.
Polarizing filters
A polarizing filter, or, as professional photographers call it in their slang, a “polarizer,” is a very, very useful thing. No graphic editor, even the latest and coolest version of Photoshop, can replace it. A polarizing filter is a must-have for any photography professional.

What does a polarizing filter do? Generally speaking, this clever piece of glass removes various kinds of glare and reflections from a photographic image. When shooting through polarizing filter Glare caused by light rays on almost any surface will disappear from your photos - on water, on glass, on glossy and other shiny textures. Unless a polarizing filter can cope with glare on metal surfaces. Among other things, this “wizard”, when shooting on a bright sunny day, can to some extent darken the sky in the photo, making it more readable, beautiful, and textured. Why does this happen? Due to the fact that a polarizing filter removes the reflection of light from the smallest droplets of water, which are certainly constantly present in the atmosphere of our planet.
Let's imagine that we have to photograph the beautiful surface of a quiet forest lake. If we shoot without a polarizing filter, or, as professional photographers say, with a “naked” lens, then in the picture on the surface of the water in this lake we will see the reflection of clouds floating across the sky, nearby standing trees, and maybe even ourselves. Of course, this reflection can be very beautiful and will only decorate the photo. But in some cases, we don’t need the reflection of various objects or just sunlight on the surface of the water. It interferes with us, is not part of our creative plan, does not fit into the general idea, the concept of the photograph. Then we put a polarizing filter on the lens, and, as they say in the circus, “voila” - and all reflections and glare on the water disappear as if by magic. The water becomes clear.


But we want to warn you about one treachery of this “wizard”. He is very cunning. He steals your light. So, when shooting, take this into account and adjust the exposure by one or even two stops - depending on what you are shooting and the quality of your polarizing filter itself. In some cases, you may even have to shoot on a tripod, since handheld shooting will require very long shutter speeds.
Another very significant advantage of a polarizing filter is that it significantly improves the colors in the photographic image you receive. Even when shooting, a polarizing filter makes them look the way you would later like to make them during post-processing of the image in a graphics editor. What is the mechanism behind all this? It's very simple. The whole point here is that a polarizing filter removes all kinds of glare and other reflections and reflections from various objects.
Look, for example, at these pictures. Some of them are made with a “naked” lens, and others with a polarizing filter. As they say, feel the difference.
Here is a classic example of using a polarizing filter. These two photographs were taken by Hoya for advertising purposes back in the last century.

Manufacturers produce polarizing filters of two main types: circular and linear. How they differ from each other - today we will not tell you. Let's just say one thing: in order to shoot with a modern digital camera equipped with automatic lens focusing and many other wonderful functions, professional experts definitely recommend using a circular polarizing filter. Such a filter is a kind of optical system of two frames, into one of which the filter itself is inserted directly. And this frame with glass can rotate freely relative to another, fixed frame, which is mounted on the lens. You achieve the effect you want by rotating the movable frame while watching the image through the viewfinder.
The main limiting factor that prevents many photographers from having a polarizing filter for every lens in their arsenal is the cost of those sweet pieces of glass. Simply put, these filters are quite expensive. And the larger their diameter, the more expensive they are. And, once you try to shoot with polarizers, you will want to have several of them for each of your lenses. So calculate your financial capabilities. We will tell you one way out of this difficult situation. Try to understand for yourself which of your lenses you most often use for shooting in cases where polarization is necessary. For this lens, buy a polarizing filter.

I would like to draw your attention to one more, and, in our opinion, quite important detail. Today you can find inexpensive polarizing filters made in China on sale. Don't buy them. They don't work well. And in general, there is no need to chase cheapness and buy polarizing filters for less than one and a half thousand rubles.
And a few more tips on how to properly use polarizing filters.
- We do not recommend using polarizing filters when shooting with ultra-wide-angle lenses. In such cases, it will be quite difficult to obtain good and uniform polarization. The focal length limit should be approximately 28 millimeters. And when shooting blanks for a future panorama, it is also better not to use such a filter. The reason is the same.
- Most best effect, which can be achieved using a polarizing filter, is obtained if the main light source is at an angle of 90 degrees relative to the imaginary line “photographer-subject”. If the light source is located in front or behind the subject being photographed, the polarization effect will be minimal.
- If you're shooting in soft, diffuse lighting, like a gray, cloudy, overcast day, a polarizing filter won't work, no matter how hard you try.
- If you screw a polarizing filter onto your lens on top of some other filter, then you risk getting vignetting in the image, sometimes even quite significant. And the amount of light transmitted to the matrix of your camera through this entire structure can decrease quite noticeably.
- We do not recommend taking photographs with a polarizing filter through glass or any transparent surface made of other material. The effect of this can be simply unpredictable. Just look at this photo:

Neutral gray filter
Neutral gray filters are also called Neutral Density or simply ND filters. They come in two types - simple and gradient. The main task of neutral gray filters is to help the photographer achieve the exposure he needs. In some cases, when shooting, you need to minimize the amount of light that passes through the lens to the light receiver, that is, the matrix of your camera.

Of course, many will say that the amount of this light can easily be reduced by lowering the exposure: either reduce the shutter speed or tighten the aperture. But with these seemingly simple techniques, unfortunately, you will not always be able to achieve the desired effect, what you want. And you can be quite constrained by a narrow aperture. But using a neutral gray filter in your work will greatly expand the boundaries of your capabilities. You can reduce the amount of light to one degree or another, while leaving the aperture unchanged, the one you need in this case.

In what cases can and should a neutral gray filter be used? For what? Perhaps the most significant example of this is the effect of “soft” or “mystical” water. Look at this photo. This is probably not the first time you have seen such pictures. A turbulent river flow, a seemingly roaring waterfall, a river flowing into the sea, and many other examples. The water in such photographs does not look like frozen drops, but some kind of soft, warm, blurry substance. This effect can only be achieved by photographing at long exposures, when the camera shutter opens for several seconds, and sometimes even minutes. How, tell me, can you shoot on a bright and sunny day at a shutter speed of, say, 5-10 seconds? It is in this situation that a neutral gray filter will help you out. Mount it on the lens and shoot at any shutter speed and aperture. Everything here depends on the density of the filter.

So, using a neutral gray filter, you get the opportunity to:
- Take photographs in bright sunlight (and other light) with a wide open aperture.
- Blur moving objects in the frame.
- In very bright, strong lighting, achieve the minimum (or any other desired) depth of field in the imaged space.
Above we discussed a regular neutral gray filter. Now we will tell you about the neutral gray gradient filter. The second differs from the first in that the darkening on it is not complete, over the entire area of the glass itself, but by gradients. That is, at one end this filter is darkened, and closer to the other the darkening gradually disappears. In what cases is such a gradient neutral gray filter needed? An example would be shooting scenes in which there is significant light contrast. Well, let's say, a landscape in which the sky occupies a large area. And the sky, as you know, is always much brighter than the ground, and therefore in such photographs it can sometimes be quite difficult to equalize the contrasts. When shooting such scenes, we install a neutral-gray gradient filter on the lens so that its dark side is located on top and shades the sky, and the completely transparent side freely transmits light to the sky. bottom part frame.

The disadvantage of such a filter is that it helps well if the border between the bright and dark parts of the frame is quite noticeable; it actually divides the frame into two parts of equal area. If there is no such clear boundary, then getting the desired effect becomes quite problematic.
Let's say a few words about how to choose the right neutral gray filter for the density. Such filters are characterized and marked by footsteps. The most popular are 1, 2 and 3 stop neutral gray filters. But you, however, can buy and use in your work a 10-stop neutral gray filter. We don't hold you back. It all depends on the thickness of your wallet.

To help you when working with neutral gray filters, we offer this small plate. We hope that it will help you in choosing the accessory you need at the moment.
What are the best filters?
That's enough serious question. Which brand, which manufacturer's filters are of better quality and more reliable? It is quite difficult to give a definite answer here. Especially if we're talking about about a polarizing filter. Today we won’t talk about what exactly are the advantages of filters from certain brands. It's long and not everyone is interested. We will do it simpler: we will name specific companies that produce good quality filters. Here they are, these manufacturers: Hoya, Marumi, Kenko, B+W, Tiffen.
Our main advice in this matter: do not chase cheapness. Of course, in some cases the Russian proverb “cheap and cheerful” works, but when choosing light filters, it’s still better not to take risks. Low price your purchase may significantly reduce the quality of your photos, and seriously disappoint you.
Today we will talk about light filters. These are little photographer's assistants that cling to the lens. Of course, in our digital age, post-processing works wonders, but in some cases filters will be indispensable assistants. Before the advent of digital, there were a great many different filters, they helped to do what programs do now, and now the need for most filters has disappeared. But nevertheless, there are 3 common filters that are still relevant:
- Protective filter - UV or ultraviolet filter
- Polarizing filter
- Neutral gray filter
Let's look at these three types in a little more detail. In order to understand what is what and why.
Protective filters - UV and company.
In general, there is confusion with this category. Technically, there are 4 different filters in this group. Neutral, UV, SkyLight and Haze anti-haze filters. The purpose of this group of filters is one - to protect the lens from mechanical damage, ultraviolet light (matrices and film are much more sensitive to it than our eyes) and from “haze” when shooting at long distances. The most common are UV and Skylight.
Skylight usually costs more, and sellers like to present it as “the best,” but in fact, its pinkish glass was intended to add “warmth” to the frame taken on film. In digital this effect is practically reduced to zero by the presence of such a thing as white balance, so it makes sense to overpay for Skylight for digital camera I personally don't see it.
No matter what manufacturers write or store salespeople say, the main purpose of protective filters is purely mechanical protection of the lens. UV filter allows
- Protect the lens from dust and sand
- Protect the front lens from scratches, fingerprints, impacts, etc.
- Protect the “edge” at the end of the lens (for screwing on filters) from bending in case of accidental impact on the lens
- Protect the front lens from precipitation, splashes of salt water at sea, etc.
Protective filters are the most inexpensive, and you can buy a filter for each lens, but do not forget that any filter is an obstacle to the path of light. Therefore, you should not chase after cheapness and buy a protective filter good manufacturer, made of high-quality glass with high light transmission. By the way, for the same reason, when using, for example, a polarizing filter, it is better to immediately remove the protective one, rather than arrange a pyramid of filters at the end of the lens.
Polarizing filter
Polarizing filter, also known as “polarizer”, is a thing in highest degree useful, in fact a must have for any self-respecting photographer. What is he doing? IN general case it removes glare and reflections from surfaces other than metal. On a sunny day, it can also “darken” the sky, making it more textured, although in reality it simply removes the reflection of light from small droplets of water and moisture present in the atmosphere.

In addition, a polarizing filter “steals” light. It can steal from 1 to 2 stops from you, depending on the quality of the filter itself. Accordingly, when using a polarizer, you may need to introduce exposure compensation, and in low light, a tripod will simply be necessary.
In addition to all of the above, a polarizing filter can significantly improve the colors in a photograph, making them immediately the same as you often do later in Photoshop or another graphic editor. The reason is the same, removing reflections from some objects. In this case, reflection does not mean what we see in the mirror, but any “reflection”.
Some examples from the series without a filter and with a filter


Below is a classic example of using a polarizer, made by Hoya back in the last century.

Polarizing filters are either circular or linear. There is no point in describing the difference between them, since for digital camera With autofocus and other functions, manufacturers definitely recommend a circular one. A circular filter is a system of two mandrels, one of which (with glass) rotates freely relative to the second. By rotating the mandrel with glass you achieve the desired effect.
The unfortunate thing is that a good polarizing filter is not cheap. And given that the diameter of lenses usually varies (and the diameter of a suitable filter, respectively), you will either need a separate filter for each lens or a bunch of adapter rings. The easiest way out of this is to understand which lens you use most often in those situations in which a polarizer will be useful to you and buy a filter specifically for it.

In addition, inexpensive Chinese NoName filters have now appeared on the market, which are not worth buying at all. I wouldn’t recommend looking at filters cheaper than 1500 rubles (~$50) at all - you risk simply throwing away money.
Some tips for using a polarizing filter:
- You should not use a polarizing filter on ultra-wide-angle lenses, as it will be difficult to achieve uniform polarization. The limit lies in focal length approximately 28mm. For the same reason, it is better not to use it when shooting blanks for panoramas.
- The greatest effect can be achieved when the light source is at 90 degrees relative to the photographer-subject line. If the sun is in front or behind, the effect will be minimal.
- In diffuse lighting, a polarizing filter will be useless. For example, when shooting a landscape on a cloudy day
- If you stack a polarizing filter on top of another, you can end up with significant vignetting and further reduce light transmission
- Do not take photos through glass or other transparent surfaces, as you may get unpredictable effects, as in the photo below.

Neutral gray filter.
A neutral gray filter, also known as Neutral Density or simply an ND filter, can be either simple or gradient. The purpose of this filter is to help the photographer make the desired exposure. Sometimes it is necessary to minimize the amount of light entering the matrix through the lens.

On the one hand, this can be done by “clamping” the diaphragm. But in this way it is not always possible to achieve what is needed, and your hands are tied by a clamped diaphragm. Using a neutral gray filter frees up your hands. We can reduce the amount of light by the desired amount and still safely choose any aperture.

Why do you need to reduce the amount of light? The most significant example is the effect of “mystical water”. Surely you have seen pictures where the water in the sea or, for example, a waterfall, looks like a “milk river” and not like drops frozen in flight. This effect can be achieved with a long shutter speed. How do you shoot at a shutter speed of, say, a second or two on a bright day? This is where an ND filter comes to the rescue.

We install the desired filter and get the opportunity to “shoot during the day as at night.”
In addition, we get the opportunity
- use wide apertures in bright light
- add blur to moving objects, “blurring” them
- get a shallow depth of field in very bright light.
A gradient filter is a type of ND filter, only the dimming is a gradient, that is, increasing (or decreasing :)). When is this useful? Well, for example, when shooting a scene with a very high light contrast, so as not to get a “knocked out sky.”

The dark part of the gradient is located in the sky, the light part is on the ground. As a result, we get the sky “not illuminated” since much less light falls on the matrix in this place. True, the gradient filter has one drawback. It will ideally help only if we have a more or less clear and even boundary of illumination separation.
How to choose the right neutral gray filter? Neutral gray filters are again characterized by stops; the most popular are 1, 2 and 3 stop filters. Although there are 10, it's only up to you and your wallet.