
High exposure photographs. Advantages and disadvantages of long exposure over short exposure
From the article you learned what the exposed camera exposure time. Now it's time to move on to the practical part and learn how to correctly set the shutter speed on your camera.
 First, let's see in which shooting modes the camera will allow us to manually control the shutter speed. To do this, turn the shooting mode dial and notice when the shutter speed field is active (highlighted). remember, that holding time denoted as follows: 1/200, 1/8, 1’, etc. On Canon cameras, the shutter speed is indicated in a field located in the upper left corner of the display.
Thus, we have experimentally established that you can manually control the camera shutter speed in only two modes - Shutter priority TV and completely manual mode M. In both cases, the shutter speed in the camera is set using the same set of actions.
 To set the camera shutter speed, switch to shutter priority mode or manual shooting mode. The field with the shutter speed value will be highlighted. This means that when you scroll the shooting settings wheel, the set shutter speed will change. If you turn the wheel to the left, the exposure time will lengthen, and if you turn it to the right, it will shorten.
Don't forget that in shutter priority mode you only control camera shutter speed, and the aperture value is selected automatically, depending on the illumination of the scene in the frame. In manual mode, you will have to install it yourself, i.e. control both shutter speed and aperture at once. So when changing one of these parameters, be sure to take care of the other! I will tell you more about how to properly manage shooting parameters in manual mode in the article “Shooting in Manual Mode”, as well as in basic course By photo.
Now it's time to really practice! After you have learned how to set the shutter speed on your camera, you need to learn to see how it affects your result. To do this, I suggest doing a few simple exercises.
To begin with, shoot only in TV mode. This is very important in order not to get confused and learn to perceive the result obtained.
 Normal exposure. Finally, ask a friend or grandma to help you practice photography. To start, set your shutter speed to 1/40 to 1/80 and ask your model not to move. Take a few shots and ask your grandmother (girlfriend, boyfriend) to wave. Now look what came of it? A smudged palm ruins the entire frame.
 Short exposure. Go outside when the sun is shining brightly. If you can find a river, a lake, or at least a fountain with water, great! If not, bring a bottle of water with you. The point of the exercise is to try to freeze drops of water in flight. Have your model spray water and take shots at shutter speeds of 1/80, 1/100, 1/160, 1/200, etc. Go to 1/640. At home on your computer, carefully examine how drops of water turned out when different meanings camera shutter speed. Note for yourself at what shutter speed they stopped looking blurry.
 Another short exposure exercise. Also on a sunny day, set the value from 1/200 to 1/640. Now ask the model to move away and run towards you (it’s better to leave your grandmother at home). At short values excerpts result in funny shots of a running man. Do the same with the model, making her jump a little.
Long exposure. To shoot at slow shutter speeds (1/30 and longer), you will need additional equipment. Therefore, we will talk more about this technique in the following articles. I will share all the tricks and techniques for working with long exposures in my basic photography course. Follow the updates on the website
I still welcome questions on the topic of the article in the comments below.
Happy shooting!
This article is about how to ‘freeze time’ in photographs using a camera.
When photographing moving objects, it is possible to ‘stop’ them using photography and see all the dynamics of movement during the ‘stop pause’. Such pictures almost always look very interesting and unusual, since in real time human eye does not see what can be seen in a still frame.
The easiest way to get the 'freezing' or ' stops‘movements in photographs are use short ones shutter Short means that the subject is captured for one short moment. The easiest way to achieve a short shot is to shoot in priority mode. Typically this mode is designated as 'S' or 'TV'. For the maximum effect of stopping time, just select the minimum possible shutter speed. For modern SLR cameras This is most often 1/4000 s or 1/8000 s. In this mode, you set the time in fractions of a second during which the image will be captured.

This simple method works very well when there is a lot of light and/or when it is possible to use a fast lens. For example, in the photo above, ISO 100 and F/1.8 were enough to get a fast shutter speed of 1/800 second and freeze the flight of the moth. But more often than not, there is not enough light, or the lens does not have high . Therefore, to achieve the effect of stopping time, you should increase the ISO values.

In this case, the movement was stopped by increasing the ISO sensitivity to 1250. In this case, a ‘dark’ lens with F/5.6 was used.
It's easier than ever to freeze motion if your camera has auto ISO control in shutter priority mode. For example, on all modern Nikon central control systems you can install a function for modes. In Shutter Priority mode, the camera will select the minimum ISO sensitivity to achieve the desired exposure at a short . For example, in the photo below I shot in this mode.

Auto ISO. I set the camera to 1/2500 second, and the camera independently selected the aperture and ISO value so that it was possible to get a correctly exposed photo at such a short shutter speed
But if there is no auto ISO function for the modes, for example, as on mine, then in shutter priority mode it is enough to manually select the ISO value so that the metering sensor shows zero deviation from the norm.

Dove in flight. Manually selected ISO 1800 to be correct when using a very fast shutter speed of 1/8000 second.
The effect is most pronounced when using the shortest shutter speeds allowed on the camera. For example, 1/4000 s or 1/8000 s.
You can get a fast shutter speed in both priority mode, manual mode, and program mode. I have no problem using everything to achieve a short shutter speed, but it requires a very long description. In short, I find it very easy to get a short shutter speed:
- In M mode (manual mode), using maximum aperture and auto ISO
- In mode A (AV, priority), using the maximum aperture and automatic value ISO, which has a maximum shutter speed of 1/1000 to 1/4000 second.
- In P mode (Program mode), using the ISO auto function, which is set to a maximum shutter speed of 1/1000 to 1/4000 second.

Sparrow in flight at short exposure. For some reason the value is not displayed in .
One more simple method stopping time is using flash. Flash makes it very easy to freeze movement when shooting in low light conditions. In this case, you do not need to use short camera shutter speeds; even 1/60 of a second is enough. This is due to the fact that freezing of a moving object occurs due to the reflected light of the flash. The duration of the flash light pulse is very, very short. For example, my Nikon has a light pulse duration at 1/1 equal to 1/880 seconds. And if you set it to 1/128 of the full flash power, then the pulse duration will be only 1/38.500 second. As the flash power increases, the duration of the light pulse increases. Since when shooting in low light conditions, virtually all the light comes from the flash, the flash plays a crucial role in creating the image. This means that you can use flash to freeze objects at speeds up to 1/40,000 of a second. This is a very short time, with the help of this technology you can take incredibly interesting pictures with time stopped.

Freeze the movement of water using flash in low light conditions. Despite the long shutter speed (1/80 sec), the very short duration of the flash pulse allowed the water to completely freeze. Flash and camera in manual control mode.
But in conditions with normal lighting, the flash will be practically useless for stopping time. In well-lit conditions, shutter speed plays a key role. And even if the flash supports it, nothing special will come of it. If we delve into the details, when shooting at short shutter speeds, for example, 1/4000 of a second using high-speed sync mode, due to the strobe effect, the picture itself can only deteriorate.

In fact, ultra-short shutter speeds of 1/4000 s, 1/8000 s, 1/16,000 s are not always needed. Very often, just 1/200 s is enough to catch an object in motion, as in the photo below:

Bee over poppy flowers. Filmed at just 1/200 of a second, yet the bee is 'frozen' in motion
Reportage photographers who shoot sports know very well how to shoot at short shutter speeds; it is very important to convey the dynamics of movement. To get more interesting photos with short exposures, I recommend.

Cheerful cat. ‘Caught’ in 1/1250 of a second
Conclusions:
To get interesting photos with time stopped (freeze) it is enough to use short shutter speeds on the camera. Fast shutter speeds are achieved by good lighting, fast lenses and high ISO sensitivities. In low-light conditions, you can freeze motion using flash.
Click on the buttons ↓ ↓↓ social networks ↓ ↓↓ — for me. Thank you for your attention. Arkady Shapoval.
by Thomas Larsen
Many photographers, especially beginners, neglect the possibilities that controlling shutter speed provides. Most often, the aperture is set, and the shutter speed is used only for compensation in order to obtain a normal exposure. In this short photography tutorial, we'll look at how shutter speed can be used to get creative and some of the mistakes photographers make when choosing shutter speed.
You should always know what you are shooting, why you are doing it and what results you can expect.
Five classic camera shutter speeds

1. Freeze motion, or shoot 1/250 s or faster
Using a fast shutter speed helps to get a fairly balanced shot, but makes the photo too static. Any movement in the frame will be frozen. You can fix this by trying to slightly change the camera's tilt to get a more dynamic photo composition. But the best option- use the technique of shooting with wiring, which we will write about later.
The faster the subject moves, the shorter the shutter speed should be. For example:
- fast moving cars or animals: 1/1000 s;
- mountain bikes or running people: 1/500 s;
- waves: 1/250 s.
It should be remembered that individual parts of the object can move very quickly. A striking example of this is a helicopter. The fuselage itself can be frozen at a shutter speed of 1/250, but for the blades even 1/2000 may not be enough. Or, for example, when photographing a girl fluttering her hair in order to freeze the ends of her hair, it is also necessary to use shutter speeds of the order of 1/1000 or even less, while the model itself is moving relatively slowly.
How do you solve the problem of “lubrication”?
You can take a lot of shots, but knowing the laws of physics and the peculiarities of recording frames on a memory card, they do it differently. First, about physics: if you throw a ball up, when will it have the highest speed, and at what point the lowest? That's right - the largest one is when the ball just comes off the hand, and the smallest one is at the point where it stops to fly down, i.e. at the peak of its movement along the top-down flight path.
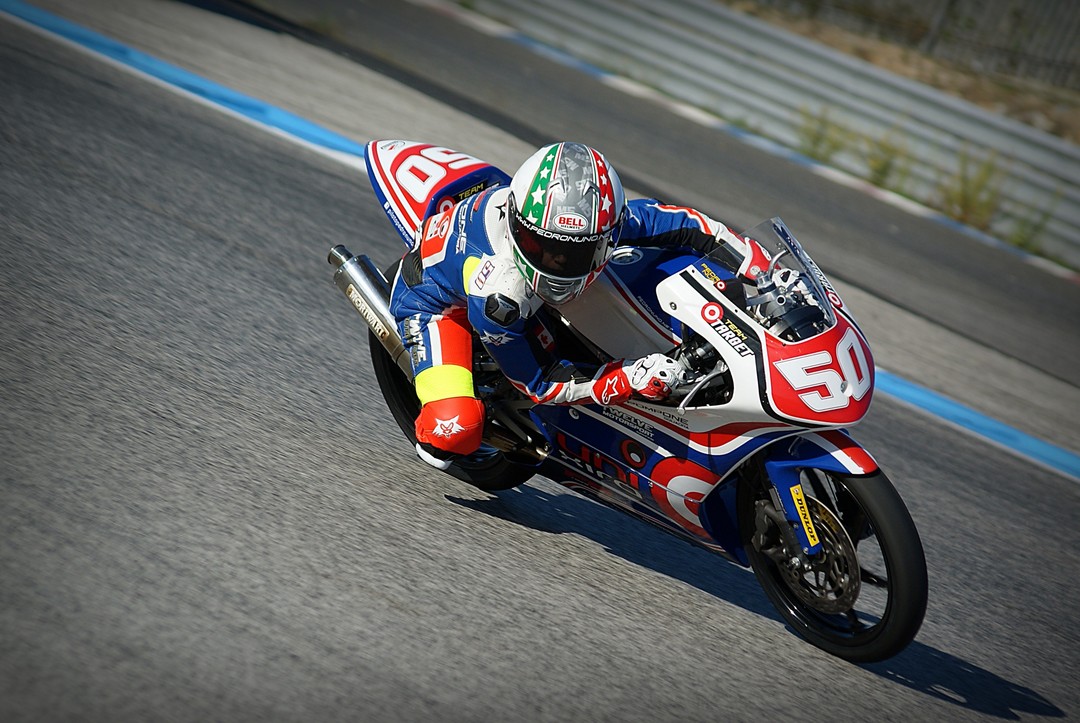
When filming competitions, where, say, motorcyclists take off on a springboard, the most interesting point is the dive, which is also the “slowest” in terms of movement. Shooting as many frames as possible is not the best approach to solving the problem. At some point the camera will simply stop to record everything on the flash drive, and on sports competitions such a delay risks losing the best shot.
Use a series of 2-3 frames instead, but while your main subject is at the peak of his or her movement. This approach gives the photographer the best chance of capturing the best images by allowing the camera enough time to record the frame to the memory card without locking up.
2. Shooting with wiring
When shooting with tracking, when the camera is used to track the movement of an object, shutter speed plays a very important role. important role. It must be in the range from 1/15 to 1/250 s.

If you have a lot of time, you can make calculations - what shutter speed will be needed to photograph cars moving in a certain area, but in reality everything is a little simpler. If everything in the frame is too blurry, then you need to make the shutter speed shorter.

If the frame freezes the movement of the car, then an increase in exposure time is required. And don’t forget that 1/125 is a longer period of time than 1/250

For example, some quantities that photographers most often use:
- fast moving cars, motorcycles or birds: 1/125 s;
- mountain bikes close to camera: 1/60 sec;
- mountain bikes, animal movement or human work: 1/30 sec.

by Jamey Price 1/60
3. How to use slow shutter speed
It is also called creative blur - 1/15 s to 1 s.

Here it is necessary to make a small technical digression and remind you what a camera is. This is an image capture tool that allows you to somewhat imitate the human eye, the human gaze. But having created this instrument, man began to obtain unusual effects that are difficult to see in life. Our vision conventionally “takes 25 frames” per second in normal lighting, and we are accustomed to seeing the world as we see it. But the camera, due to the fact that it is different, can show us the world differently.
In particular, make a frame overlay () or with a slightly longer shutter speed show the blur of moving objects, turning them into a line.

A similar effect can be observed with your eyes if you quickly turn a flashlight in complete darkness. An eye adapted to darkness will perceive a moving spotlight as a line.
A slow shutter speed is used to photograph, for example, a waterfall. In this case, specialists, of course, use manual settings and , but you can simply set the camera to shutter priority mode (Tv).

by Roland Maria, 3"
Here are some shutter speeds for motion blur:
- fast waterfall flow: 1/8 s;
- people walking near the shooting point; waves; slow water movement: 1/4 sec.
In bright conditions (on a sunny day), it may be difficult to obtain the required shutter speed (below 1/8 sec.), even by changing the aperture or using low ISO settings. To reduce the amount of light, use a neutral gray (ND) filter, which is exactly what it is designed for. In ours you can find neutral gray filters of variable density, which allow you to reduce the amount of light passing through the lens to almost zero and can even turn a sunny day into night. Well, and of course, when using long exposures, it becomes mandatory to use or.
4. Photography with shutter speed from 1 s to 30 s
There are processes that take long time, and shutter speeds up to 1 second are no longer enough. These processes differ not only in time, they differ in perception. At shutter speeds from 1 to 30 seconds, all processes that occur quickly in the frame are erased, leaving only static... soft static. There is a feeling that the world has frozen. The movement disappears again. Only if at shutter speeds of 1/1000 the movement disappears, but a person sees an object that could move, then at a 30 second shutter speed there is no movement left.

This effect can only be achieved if you use a tripod. At the same time, it can no longer be light and portable, but a stable and heavy model is needed, since even a slight wind will affect image acquisition. Photographers often use a simple technique - they hang additional weight on a tripod and most often use this weight to hiking conditions serves as a working photo backpack. On most tripods you can see a hook at the bottom for hanging the load and, accordingly, giving it greater stability. Additionally, we recommend that you familiarize yourself with some other working techniques -.
Excerpts that photographers use to create photos like this:
- the movement of the wind in the leaves of the trees: 30 s;
- smooth movement of the sea surface: 15 s;
- fast moving clouds: 8 sec;
- waves with some details preserved: 1 s.
If you plan to shoot before sunrise or after sunset, be prepared for the light to change very quickly, so you'll need to change your aperture (or use a faster or slower shutter speed).
5. Shooting at night - shutter speed over 30 s
Shooting at night means there is very little light. Accordingly, many photographers want to increase the value, which most often leads to an increase in noise when individual pixels begin to appear much brighter than others.

If you leave the ISO minimal and just set a long shutter speed, this will lead to some reduction in image noise.
Most often, astrophotographers—that is, people who photograph the starry sky—face similar problems. In addition, with long exposures due to the rotation of the Earth, an effect occurs when the stars line up in a round dance.

In order to avoid this, special equatorial mounts (tripods for telescopes) are used, which allow them to compensate for the movement of the Earth.
For example, to photograph the night sky you might need the following exposure times:
- individual stars or full moon landscapes: 2 min.;
- star tracks: 10 min.
Global bug fixes
Hand trembling
In addition to the fact that the selected shutter speed should depend on the speed of the object and the amount of light, we remind you that the shutter speed is also affected by such a phenomenon as blur from natural hand trembling. The longer the focal length of the lens, the shorter the shutter speed should be. You can roughly calculate it as follows - the focal length in mm corresponds to the shutter speed in fractions of a second. That is, with a 50 mm lens, you can shoot handheld at a shutter speed of at least 1/50 sec without fear of blurring (unless, of course, you are dancing at this time or riding a tour bus), and for 200 mm you will already need 1/200 sec.

Even a simple monopod allows you to increase shutter speed by 1-2 times. The photographer has the opportunity to shoot with longer shutter speeds. A good tripod allows you to take photographs at any shutter speed.
The exposure time is a quality indicator even at . According to the observations of professional portrait photographers, at a shutter speed of 1/50, portraits turn out “alive.” With longer shutter speeds, blur appears, and with shorter shutter speeds, portraits turn out too frozen.
Failure to correctly use the camera's shutter speed will lead a novice photographer to stagnation. creative development. There is no need to be afraid to master what is initially difficult to perceive. Ask questions, together we will look for answers from advanced and professional photographers.
Greetings to all amateur photographers! Today, in the “Photography Theory” section, we will take a closer look at one of the components of exposure, namely shutter speed, find out what it can be, what it affects in photography, and what effects can be achieved if you adjust the settings correctly.
We also want to draw your attention to the fact that the material contained below may be useful when creating photos for the project.
So, let's start studying.
The camera shutter is like a curtain that opens to allow light exposure to begin, and then closes to complete it. As a consequence, the picture does not reflect a moment, but a certain interval of time. The term used to describe this interval is "excerpt"(exposure duration).
The shutter speed is calculated in fractions of a second: for example, 1/30 s, 1/60 s, 1/125 s, 1/250 s. Only the denominator is displayed on the screen of many cameras - “60”, “125”, “250”. Often, long exposures are displayed as a number with quotation marks – 0”8, 2”5. There is also a standard range of shutter speeds. 1 , 1/ 2, 1/ 4, 1/8, 1/15, 1/30, 1/60, 1/125, 1/250, 1/500, 1/1000, 1/2000, 1/4000 s . For the longest shutter speeds, the camera has a "Bulb" setting - the shutter is open as long as the shutter button is pressed.
Short(1/250 sec and shorter) the shutter speed seems to “freeze” any movement, and the photo turns out clear, without the slightest blur.
In general, a shutter speed of about 1/250 - 1/500 is sufficient to capture human movement, but for close or extremely fast subjects, 1/1000 or 1/4000 of a second may be required.
Fast moving cars or animals: 1/1000 s;
Waves: 1/250 sec.

Long shutter speed makes it possible to properly expose the frame, especially when there is insufficient lighting - at dusk, at night. It also allows you to shoot many interesting stories. Since with a long shutter speed there is a possibility of “shaking” and blurring, it is advisable to use stabilization if the camera or lens has it. IN similar cases a good helper turns out to be a tripod. Stabilization should be turned off when mounting the camera on a tripod.

Depending on what shutter speed we use when shooting, short or long, we can get completely different effects in the photo.
Whenever there are moving objects in the frame, the choice of shutter speed determines whether the motion will be frozen or cause blur. However, it is not possible to change the shutter speed itself without affecting the exposure or image quality.
1. When reducing shutter speed you need to:
Increase ISO speed (possible by-effect: visual noise in the photo)
Close the aperture (side effect: depth of field may decrease)
2. When increasing shutter speed you need:
Reduce ISO (side effect: you can't do without a tripod)
Open the aperture wider (side effect: decreased sharpness)
It’s very good when the camera has a bulb mode. In this mode, you can manually set the time for which the shutter will be open. The manual shutter mode will be useful when photographing celestial objects at night, in scientific photography, when a process is filmed slow in time. If you shoot, for example, night landscape with a starry sky on a moonless night with a shutter speed of several hours (at an average aperture value), then the image will show traces of the rotation of stars, an arc relative to the North Star. But again, you should be aware of noise in digital cameras, especially when high values photosensitivity (ISO).

To get the correct exposure in a photo, you need to take all this into account and select the values of three values (ISO, aperture, shutter speed) depending on each specific scene and situation.
What should be the endurance for different situations.. Let's look at examples.
Five classic camera shutter speeds:
1. Freeze the motion, or shoot 1/250 s or faster.
The faster the subject moves, the shorter the shutter speed should be. For example:
Fast moving cars or animals: 1/1000 s;
Mountain bikes or running people: 1/500 sec;
Waves: 1/250 sec.

It should be remembered that individual parts of the object can move very quickly. A striking example of this is a helicopter. The fuselage itself can be frozen at a shutter speed of 1/250, but for the blades even 1/2000 may not be enough. Or, for example, when photographing a girl fluttering her hair in order to freeze the ends of her hair, it is also necessary to use shutter speeds of the order of 1/1000 or even less, while the model itself is moving relatively slowly.
Using a fast shutter speed helps to get a fairly balanced shot, but makes the photo too static. Any movement in the frame will be frozen.

You can fix this by trying to slightly change the camera's tilt to get a more dynamic photo composition. But the best option is to use the wiring technique, which will be discussed later.
2. Shooting with wiring.
Shooting with “wiring” is a technique that gives the effect of movement in the picture, while the object turns out sharp against a blurry background.

And here endurance plays a very important role. It should be in the range from 1/15 to 1/250 s. If you shoot at faster shutter speeds, 1/500-1/1000, the effect of movement will decrease or disappear altogether. Because a short shutter speed will make the background and the subject equally sharp. Compare these two photos.
|
|


For example, some quantities that photographers most often use:
Fast moving cars, motorcycles or birds: 1/125 sec;
Mountain bikes close to camera: 1/60 sec;
Mountain bikes, animal movement or human work: 1/30 sec.
3. Creative Blur - Shutter speed 1/15s to 1s.
For example, fast flowing waterfall: 1/8 s; people walking near the shooting point; waves; slow water movement: 1/4 sec.

In bright light conditions (on a sunny day), it may be difficult to obtain the required shutter speed (below 1/8 sec.), even by changing the aperture or using low ISO settings. To reduce the amount of light, use a neutral gray (ND) filter, which is designed for just this. Here you should also not forget about the tripod.

The set shutter speed also affects the transmission of weather in the image. You can convey rain in solid lines using shutter speeds of 1/4 s or longer. If you want to “freeze”, stop individual snowflakes in flight, set the shutter speed to 1/125 s.

Adding flash to a blur photo allows you to freeze certain subjects, meaning you can move the camera around for an artistic effect.

A long shutter speed combined with the movement of a small constant light source allows you to add a graffiti effect to the image.

4. Photograph with shutter speed from 1 s to 30 s.
There are processes that take a long time, and a shutter speed of up to 1 second is no longer enough. These processes differ not only in time, they differ in perception. At shutter speeds from 1 to 30 seconds, all processes that occur quickly in the frame are erased, leaving only static... soft static. There is a feeling that the world has frozen. The movement disappears again. Only if at shutter speeds of 1/1000 the movement disappears, but a person sees an object that could move, then at a 30 second shutter speed there is no movement left. This effect can only be achieved if you use a tripod.
Shutter speed (shutter speed) is the amount of time the shutter remains open and light hits the film or digital sensor. The right combination of exposure settings - shutter speed, aperture and sensitivity - allows you to get rich, clear and contrasting images. Learn to set the right shutter speed and the quality of your photos will improve.
Steps
Part 1
What is shutter speed- Shutter speed is the amount of time the shutter remains open. In other words, this is the length of time during which light falls on the camera sensor. Usually it is only a fraction of a second.
-
Learn how shutter speed is measured. Shutter speed is measured in seconds and fractions thereof. Its value can vary in the range from 1/8000 to several seconds. Most often, shutter speeds of 1/60 and shorter are used.
Understand the difference between short and long exposures. To choose the right shutter speed in a given situation, you first need to know what a short and long shutter speed is (high or low shutter speed). A value of 1/60 is usually considered borderline.
Find the shutter priority mode in the settings. Most cameras allow you to shoot in shutter priority. This means that you choose the shutter speed depending on the shooting conditions and artistic intent, and the camera automatically selects the corresponding aperture value.
Consider focal length. The longer the focal length of the lens, the higher the sensitivity to shock. Therefore, it must be taken into account when choosing shutter speed. If you are shooting with a long lens, you should use a slower shutter speed.
- In the shutter speed value, the denominator of the fraction must be at least equal to focal length or be bigger than him. For example, with a 50 mm lens you can shoot handheld at a shutter speed of no more than 1/50 of a second, with a 200 mm lens - no more than 1/200 of a second.
Part 2
Selecting a shutter speed-
Choose a shutter speed that will not blur stationary objects. The main thing you need to achieve when taking photos is to avoid camera shake. Use a fast shutter speed to prevent the image from coming out blurry. For this type of photo, try setting it to at least 1/60. If you have Strong arms and you can hold the camera still, a good result will be obtained at a shutter speed of 1/30.
- In this case, changing the shutter speed will not play a fundamental role, other than changing the overall exposure settings, unless there is movement during the exposure that causes the image to be blurred by at least a pixel. But even then the photo will be only slightly less sharp. The real difference will only be seen with noticeable movement (shaking).
- The image stabilizer built into your lens or camera will allow you to slow down your shutter speed a step or two when shooting handheld. This is also facilitated by a stronger grip on the camera.
- By mounting your camera on a tripod or other fixed support, you will get rid of shake, which is especially important when shooting with long exposures.
-
Choose a fast shutter speed to freeze movement in the frame. To set your shutter speed, you must decide whether you are shooting a still or moving subject. To photograph a subject in motion, the shutter speed should be fast.
Understand what shutter and shutter speed are. The shutter is a device in the camera that regulates the amount of light entering it. When you take a photo, it opens briefly to allow a certain amount of light to hit the camera sensor. The shutter then closes again, blocking the light.